Peel n Stick Wall Tiles: The Easiest Way to Add Acoustic Comfort to Any Room
If you're searching for a fast, tool-free way to reduce noise and refresh your walls, peel n stick wall tiles are the answer. Our Peel n Stick Acoustic Wall Tiles combine sound-absorbing performance with a durable, pinnable surface — no glue, no framing, and no specialist installation required.
What Are Peel n Stick Acoustic Wall Tiles?
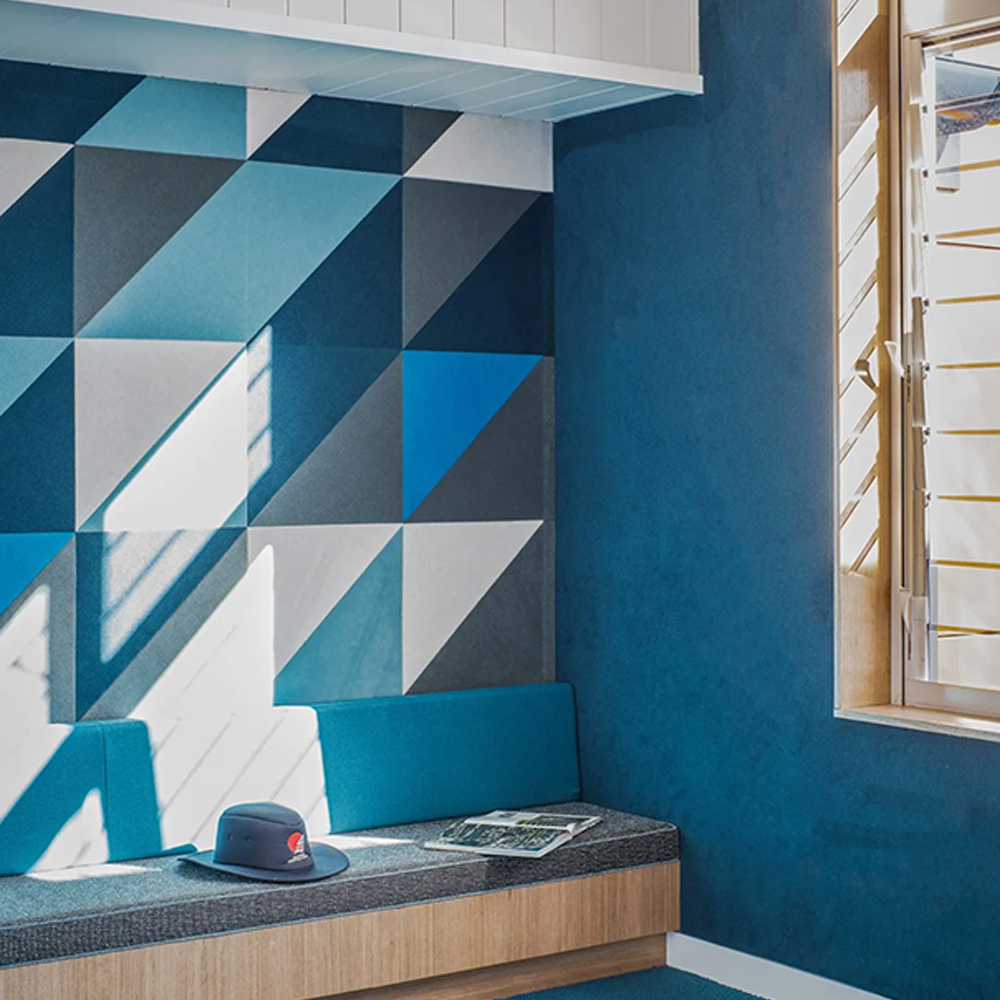
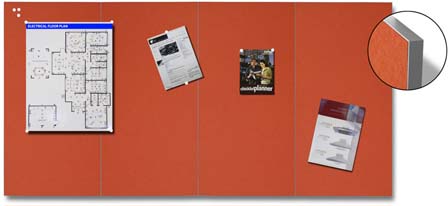
Peel n stick acoustic wall tiles are self-adhesive acoustic panels designed to reduce reverberated noise while doubling as a functional pinboard surface. Each 600 x 600mm tile features a high-performance adhesive backing, so you simply peel, position and stick directly to the wall. There's no need for tools, brackets, or professional installation, making these acoustic wall tiles one of the fastest ways to improve a space.
Why Choose Self-Adhesive Acoustic Panels?
Traditional acoustic panels often require framing or wall fixtures, which adds cost and installation time. Self-adhesive acoustic panels remove that barrier entirely. Our peel n stick tiles are built from Autex acoustic fibre with an NRC rating of 0.40, helping absorb sound and reduce echo in busy environments such as:
- Schools and classrooms
- Offices and meeting rooms
- Libraries and staff spaces
- Healthcare facilities
- Collaborative and open-plan commercial spaces
The premium fabric surface is also pin-receptive and Velcro® compatible, so once installed, the tiles double as a display space for notices, artwork, photos, and presentations — giving you an acoustic pinboard panel and a feature wall in one product.
What Walls Can Peel n Stick Tiles Be Installed On?
Peel & Stick Adhesive Wall Tiles are designed for direct fix installation onto flat, solid substrates. To get a lasting, high-quality bond, the wall surface should be:
- Flat, dry, and structurally sound
- Free from dust, grease, and other surface contaminants
- Painted with a stable coating — some paints contain additives that resist bonding, in which case a light sand and wipe-down with a residue-free detergent improves adhesion
- Fully rendered if it's a concrete block wall
- Fully cured if it's new concrete, which generally means allowing 28 days before installation
- Free of moisture, hydrostatic pressure, and excessive alkalinity, with any efflorescence (white powdery residue) removed and a sealer/primer applied first if needed
Any high or low spots should be levelled before installation, and it's best practice to test-fit one tile first to confirm the wall and surface preparation are suitable before doing the full run. Installation should also take place in stable conditions — room temperature above 18°C and relative humidity below 75% — since conditions outside this range can affect how well the adhesive performs.
Can Peel n Stick Wall Tiles Be Cut?
Yes. Peel n stick wall tiles can be easily trimmed on-site to fit around corners, edges, and obstacles using a snap-blade knife and a straight edge. To get a clean fit along adjoining walls, installers place the tile to be cut underneath the neighbouring tile and use it as a cutting guide, so the finished join lines up neatly. This makes it straightforward to tile a full feature wall edge-to-edge, even in rooms that aren't perfectly square.
One thing to keep in mind: because the adhesive backing is pressure-sensitive, tiles can't be repositioned once applied, and removal can damage the paint or plasterboard underneath. It pays to measure, mark, and dry-lay your pattern on the floor first so your cuts and layout are right before you commit any tile to the wall.
Installation Tips for the Best Finish
A few simple steps make the difference between a good result and a great one:
- Let the tiles acclimatise first. Remove the tiles from their packaging and let them sit in the installation room for 1-2 hours before fixing, so they adjust to the room's temperature and humidity.
- Don't remove the release film early. Keep the backing film on until the moment you're ready to install each tile — once it's off, the adhesive surface must be kept away from dust and moisture.
- Mind the pile direction. Each tile has directional arrows printed on the back. For a uniform look, lay every tile with the arrows facing the same way (we recommend arrows pointing down). If you'd prefer a patterned effect, tiles can instead be laid in a checkerboard style — just note that alternating direction will create a subtle colour variation across the wall, which is a design feature rather than a fault.
- Plan your layout before you stick anything down. Measure and mark your wall, use a spirit level to keep lines straight, and check the distance to adjoining walls so you're not left with an awkward sliver of tile at either end. Laying the tiles out on the floor first is a simple way to confirm the pattern works before committing to the wall.
- Apply firm, even pressure. Position each tile at an angle, press one edge to your guideline, then lower it into place working from the centre outward. Go over the full surface with a roller (a domestic rolling pin works well) to lock in a strong bond.
- Finish with a final roll. Once every tile is up, re-roll the whole installation to ensure consistent adhesion across the wall.
Coverage, Sizing and Colours
Each pack of peel n stick wall tiles contains six 600 x 600mm tiles, covering 2.16m² of wall space. They're available in 12 contemporary Autex colours — Atlantis, Electric Blue, Falling Water, Flatiron, Ink, Koala, Myst, Petronas, Porcelain, Savoye, Spearmint, and Stonewash — so you can match the tiles to your existing interior design or create a bold feature wall.
Key Features at a Glance
- Easy peel-and-stick installation, no glue, tools, or framing required
- NRC 0.40 acoustic rating for improved sound-absorbing performance
- Pinnable and Velcro-compatible surface for flexible display use
- Pack of 6 tiles covering 2.16m² of wall
- 12 Autex colours available
- Ideal for education, healthcare, and commercial acoustic solutions

Where to Use Peel n Stick Wall Tiles
Because installation takes minutes and there's no wall damage risk from framing, these acoustic wall tiles suit a wide range of applications. Schools use them to create quiet reading corners and reduce classroom noise. Offices use them behind desks or in breakout spaces to soften open-plan acoustics. Healthcare facilities use them in waiting rooms and consult spaces where a calmer, quieter environment matters. And because the surface is pinnable, they're just as useful as a display wall for team updates, student work, or event planning.
Fast, Simple, Effective
Whether you're managing noise in a busy workspace or looking for an easy way to add colour and function to a wall, our Peel n Stick Acoustic Wall Tiles deliver a modern acoustic solution without the complexity of traditional installation. With Australia-wide delivery and multiple-item discounts available, upgrading your space has never been easier.
Explore the full range and place your order: Peel n Stick Wall Tiles – JustBoards
📞 FREECALL 1800 654 917